Tuesday, November 30, 2010

A tasty treat...

Good Morning! Today I have a cute little card with a matching tag for you, using one of the brand new Cocoa digi images, chef cocoa.
I wanted to take a break from holiday cards so I decided to make a card that could be used for any occasions... as long as you have a sweet and tasty treat to give...


The sentiment is from kitchen sentiments, another new digi set that goes with this sweet cocoa perfectly.
I used Spellbinders dies, my favorite Martha Stewart border punch, a Cuttlebug embossing folder, silver rhinestones, some retired SU! buttons, and Black and White Baker's Twine... Sweet Cocoa was colored with Copic Markers.
To add dimension and texture to my card, the images were cut out and the background was sponged with brown ink.

Do you like Cocoa? Do you like challenges? If you answered yes to either, then you must check out the brand new Crazy 4 Cocoa Challenge Blog!

Thank you for visiting!

Monika

December Guest Designers

It seems that we say every month that it is hard to believe that the current month is over but is it really the last month of 2010??? Where did the year go? Before I introduce our December guest designers I want to thank our November guest designers Roxie Glaza and Julie Smith for an outstanding month! I have truly enjoyed their creations this past month and I am sure that you all have as well.

The 2 talented ladies who will be joining us as guest designers for December are Denise Marzec and Danielle Shaffer.

Denise Marzec
is an SCS dirty dozen alumni. She has a beautiful simple style and boy can that girl color! I was thrilled when she accepted my invitation to join us this month! I am also blessed to be able to call her a friend. A picture and a little more information on Denise...


Hi there, I’m Denise (peanutbee on SCS). I live in Pennsylvania and work from home as a transcriptionist. I’m married to an awesome guy who is most definitely my best friend and biggest support, and I’m a mom to two beautiful girls. I started out my paper crafting journey as a scrapbooker and then in 2007 I was introduced to stamping and card making. I found SCS and the whole world of blogging, I’ve been lucky to be a part of some amazing design teams, and the coolest part is I’ve made some awesome friends through it all. I got to attend my first CHA consumer show this past summer (amazing experience), took a couple Copic classes in October with Suzanne Dean, and recently worked at a local stamp show where I got to meet Korin and Janette! What sweethearts! Coloring images is my favorite part of crafting; I think it’s relaxing. Thank you Korin, Janette, and all the girls on the SNSS team for having me as your guest this month! I’m excited to be here!

Danielle Shaffer is a frequent participant of the Sweet Stop Sketches. I immediately noticed her work and just knew that I wanted to invite her to be one of our guest designers. I was very excited when she accepted. Below is a photo and a little more info on Danielle.


I started scrapbooking in early 2006 just after my second daughter was born. I love scrapbooking, the whole process of being able to turn regular pictures into art is something I enjoyed...and then I found cards and copics! I dabbled in cards until January 2008 when I discovered Copic markers and I haven't looked back. I love making cards because I can make something different every time, and I can finish a project in one sitting. Nothing motivates like seeing the finished product! Just this past summer I discovered digital stamps and that has opened up a whole new world for me. I am excited to be the Guest Designer this month at Sweet N Sassy Stamps and so honored that I was asked. I am both amazed and grateful for the wonderful friends that I have made on my papercrafting journey so far and I am excited for what the future holds.

We are so fortunate to have both Denise and Danielle with us this month. I know I am looking forward to seeing the awesome creations that they will have to share!

Poinsettias and Polk Dots

The poinsettia images are colored with Prismacolor pencils. After cutting out the image the edge of the cardstock is colored with a black marker to define the image; it is attached to the panel with tacky glue. This image is perfect for cutting and arranging.

Glitter was applied to the flower centers and in areas around the images.

The frame is designed to cut the rectangle out of the center but by rolling the die into the machine just far enough to cut the edges and rolling back out again will keep it as one piece which is easier to work with as a full card.
Dry emboss the entire panel.
Sponge the dots before removing the cardstock from the die.
Mask off the rectangle with sticky notes and ink distress the edges.

click to enlarge
To form the card - cut a second frame with the same procedure but don’t emboss. Score ½” from the top, fold, apply adhesive above the score line and attach to the front panel
click to enlarge
The envelope is embossed with the long edge of frame die and sponged with ink.

Stamps: Sweet n’ Sassy Stamps – December Poinsettia
Paper: white cardstock
Ink: Memento – Tuxedo Black, Ranger distress ink – spun sugar
Accessories: Prismacolor pencils, baby oil, Art Glitter adhesive, Expressions glitter, Diamond Glaze, Pearls, Aleene’s tacky glue, Marvy black marker
Tools: cutting scissors, paper stumps, Frameabilities, Cuttlebug, stamp positioner, sponge, sticky notes
Techniques: Prismacolor, dry embossing, sponging, ink distressing

Monday, November 29, 2010

Are you a Cocoa Mouse fan?

Then you MUST check out our brand new challenge blog....Crazy 4 Cocoa Challenges.

Our debut challenge is TOMORROW, Tuesday, November 30th. We are GIVING AWAY an exclusive Cocoa digi to EVERYONE who plays along with the first challenge.

You can read more about it here: http://crazy4cocoachallenges.blogspot.com/2010/11/introducing-crazy-4-cocoa-challenges.html

I hope you'll join the fun!

~Korin

Cocoa's Christmas Tree

Happy Monday!
Can you believe Thanksgiving has come and gone. Get ready Christmas shopping. How about making a package of Christmas cards for a gift. Everyone loves homemade crafted cards. Check out the new December digis at Sweet 'N Sassy stamps. I can't decide which one is my favorite I love them all and you will too!

For today's card I used Cocoa's Christmas Tree. I colored it with copics. I colored the ornaments with gel pens and added gold beads for the trim! I used a circle nestie and eyelet circle for my focal image. A red silk ribbon ties up the card!

Have a great week and start making those Christmas cards!!!


Sunday, November 28, 2010

Customer spotlight Sunday


I am happy to feature Rhonda Ziemer today for our customer spotlight Sunday. I was browsing an online gallery and this adorable snowman card caught my eye. Rhonda used the Love You This Much stamp set for her card. This cutie is also available as a digi called Country Snowman. I love how she paper pieced the snowman's coat and hat, I never thought to try that with this image.

When I was linking up this post for today, I saw another adorable card on Rhonda's blog and I wanted to show you guys this one too. I just love this self-conscious Paulie image, it just cracks me up. I hope it brings a smile to your face too.


Thank you Rhonda for letting us share your cards today! I know that they have inspired me.

Have a blessed day everyone!

Saturday, November 27, 2010

Happy Saturday After Thanksgiving!

Good morning everyone!
Julie here with a very CAS card!
This post is going up a bit late, due to some technical difficulties...
(aka...internet issues)

I hope you'll enjoy my CAS take
on a Christmas card made with the wonderful
I think I could totally mass produce this one!


Card details:
Paper: White
Ink: Red, Green, Antique Linen
Misc: Scor Pal, tiny red rhinestons

Have a great Saturday everyone!

Friday, November 26, 2010

Chef Cocoa

Hi there,
 I hope all of our American friends had a wonderful Thanksgiving yesterday and didn't eat too much turkey. I am sharing another sneak peek with you that will be available Dec. 1st, Chef Cocoa. I love this image it is great to use to make a card to include with your dish.

Thursday, November 25, 2010

Cocoa's Christmas Tree

Happy Thanksgiving to our American friends. Hope you have blessed day with your families and enjoy a yummy Thanksgiving meal.

For today I am showing you a sneak peek of one of the digis that will be available Dec.1st. Cocoa's Christmas Tree. Isn't he the cutest?


I used copics for the tree and prismacolor pencils blended with odorless mineral spirits for him. Then I used stickles for the star and bulbs and silver liquid pearls for the garland. The design paper is Echo Paper's Merry Christmas that is available in the Sweet 'n Sassy store.

Happy Thanksgiving!

Tuesday, November 23, 2010

A Deer Friend


I wanted to show you one of our older digis today. With so many awesome images in the store sometimes they can be overlooked. The image I am featuring today is called Deer Friends. Notice the plural friends? This is one of the really cool things about digis, you can crop them, flip them, and pretty much customize them how you want. So, I wanted to make a square card and the entire image would not fit so I just cropped out the larger deer. The image is colored with copics, shimmerz paint was added to the bow, and rhinestones accent the antlers.


Thank you for stopping by today. I can tell you that today is going to be a crazy day for me- cooking, cleaning, shopping and general prep for tomorrow. I am not ready and running behind of course lol. The one thing I keep telling myself is that my family is coming over to spend time with one another not to see how clean my house is or to eat a perfect meal- at least I hope that is what they are thinking ;). Anyway, I hope that all of you who are celebrating Thanksgiving tomorrow have a very blessed Thanksgiving.

God bless!

Victorian Poinsettias

Happy Tuesday to everyone, today I’m showing you the December Poinsettia image with some rich Victorian colors.

Card size: 4.25"
-Prismacolor pencils, baby oil and paper stumps were used to color the image using the Gamsol technique. Baby oil replaces the Gamsol/mineral spirits.
-The pearls are attached with Diamond Glaze (any lacquer product will work).
-Art Glitter adhesive was used to apply glitter to the yellow berries.
-Ink distressing was done on all Kraft layers.
-An A2 sized envelope with an insert is perfect to mail square cards. For the insert; punch a shape in the very center for ease of removing.
Apply a line of glue 1/4 to 3/8” from the side edges and insert with glue to the front of the envelope. Place the card between the insert and envelope front so it doesn’t shift around.  Perfect fit and saves on postage.

Stamps: Sweet n’ Sassy Stamps – December Poinsettia
Paper: white, The Paper Company – Kraft, K&Company designer paper
Ink: Memento – Tuxedo black, Ranger: tea dye distress ink
Accessories: Prismacolor pencils, baby oil, Art Glitter adhesive, Expressions glitter, Diamond Glaze, Pearls, Aleene’s tacky glue, Marvy black marker
Tools: cutting scissors, paper stumps
Techniques: Prismacolor, dry embossing, sponging, ink distressing

Happy Thanksgiving and don’t eat too much!

Monday, November 22, 2010

Cherry-topped Cupcake


Hello and Happy Monday! Can you believe that Thanksgiving is this Thursday?!! Christmas will be here before we know it!! I haven't really started my shopping yet but I do have my Christmas cards started.

For today's card I used the Cherry-topped Cupcake, it's one of the .99 digi's and it's perfect for making a quick birthday card. I like to keep cards like this on hand. One of my goals for next year is to send out more cards!

Thanks for stopping by and have a wonderful day!

Saturday, November 20, 2010

Customer spotlight Sunday


Since this week is Thanksgiving here in the United States I wanted to take this opportunity to show you a beautiful fall card before we head into the winter season. This lovely creation is brought to us by Lisa Hacker. Lisa used our fall arrangement digi for her card. The image is colored beautifully and I love the dimension on the flower and the bow!

Thank you Lisa for allowing us to share your wonderful creation!

Happy Saturday!

I have Christmas on my mind...as I'm sure most of you do as well!
I decided to make some wrapping paper and tags to match!

I love the look of kraft paper and bought a huge roll to wrap some gifts in.
I decided to use the snowman from the Primitive Christmas set

here is my project for today:

You can also find me here....


Project details:
Stamps: Primitive Christmas from SNSS
Paper: Kraft, white, kraft wrapping , Ranger antique linen
Misc: Copics, bakers twine, PTI dies, nesties

Happy weekend everyone!!!

Friday, November 19, 2010

You're my cup of cocoa!

You are, really! In fact, all of our customers and readers are my cup of cocoa :).

Are you ready for the holidays? Has the baking and shopping begun? I haven't quite gotten into the baking full swing, but I have been shopping :)....online shopping, that is :). I LOVE shopping from the comfort of my home with a nice cup of coffee OR cocoa in hand and the Christmas music on shuffle :). Amazon loves me and probably knows me on a first name basis ;).

For my Cup of Cocoa card I used some of the yummy new Merry Christmas Echo Park papers we are carrying in sampler packs. I have to tell you, this paper is top notch! If you haven't grabbed some yet, I encourage you to head over to our website to grab some quick. Our quantities are selling fast!

Cocoa and I hope you have a fabulous weekend! We are looking forward to a day of stamping with some friends tomorrow. It's sure to be a great time! I'll be creating some fun samples using our NEW December digis.......yes, more Cocoa :)! Sneak peeks begin next week!

Blessings,

Thursday, November 18, 2010

Blessings to you at Christmas


Good Morning. Thanks for dropping by.
Today I want to share two adorable images from Sweet' N Sassy Stamps. My first card is Cocoa's Ornament. Isn't he cute?

I had fun coloring this fun little guy with my Copic markers. Y32, YR23, YR24, YR21, 0 W0, W1, W3, W5, G40, G95, G99, E02, E11 and Peach Spica Glitter Pen.

I also used the Saturday Sketch Challenge from The Sweet Stop ( SSS81 ). Please play along
the Sugar Babies every week and link your card to the blog so we can all see your wonderful creations.

Card Recipe
Stamps: Cocoa's Ornament, Sentiment from Elzybells
Ink: Memento Tuxedo Black, Distressed Ink Antique Linen
Paper: Garden Green, More Mustard, Graphic 45 Let it Snow and Georgia Pacific White
Accessories: Copic Markers, Summer Sunrise Ribbon, Garden Green brads, Classic, Scallop and Long Rectangle Nestabilities, Fiskars Treading Water border punch, Snowflake Cuttlebug Lg. embossing folder.

My next card is Christmas Bear. When I saw him I wanted to use blue and silver so this what I came up with. I get in so much trouble when stamps make me smile.

Card Recipe
Stamps: Christmas Bear
Ink: Memento Tuxedo Black, Bashful Blue
Paper: Ballet Blue, Georgia Pacific White. The designer paper is from my scraps so I don't know who makes it.
Accessories: Copic Markers, Bo1, B21, B23, B24, B32, E41, E43, E44, E47, 0, C0, C1. Star Dust Gelly Roll glitter pen, Blue and White satin ribbon, Buttons, Ballet Blue Brads, Rustic Cream Button Twine from Papertrey Ink, Martha Stewart Snowflake border punch, Classic Rectangle Nestabilities, Snowflake Cuttlebug embossing folder and Stampin Dimensionals.


I hope that you enjoyed these cards and have a wonderful day.

Wednesday, November 17, 2010

A Gift for Snowman

Well, Christmas is right around the corner. How many Christmas Cards do you have made? I love making cards with snowmen when I have lots to make because there is little coloring to them and they make up quickly.

I love hand stitching on my card and this stitch to me resembles snow flakes.
I glittered his body and used faux flowersoft for the snow.

Thanks for stopping by.
Have a Blessed Day!
Nancy

Tuesday, November 16, 2010

Sweet Little Mouse

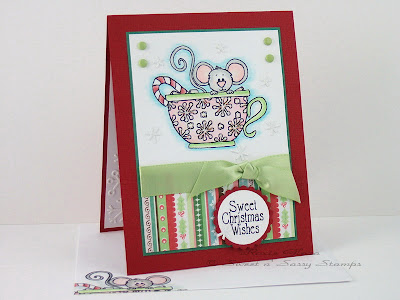
No matter how this mouse image is presented it’s just adorable!  Today Cocoa is sitting pretty in the Cup of Cocoa set and paired up with some festive holly, snowflakes and scallops.

-Prismacolor pencils, baby oil and paper stumps were used to color the image using the Gamsol technique. Baby oil replaces the Gamsol/mineral spirits.

-The pearls are attached with Diamond Glaze (any lacquer product will work).

-Art Glitter adhesive was used to apply glitter to the snowflakes and candy cane.

Envelope: 1/2", 1/8" and 1/16" strips were cut and glued to the card.

Stamps: Sweet n’ Sassy StampsCup of Cocoa
Paper: Unknown textured white cardstock, Georgia Pacific – green cardstock, Bazzill – deep pink, K&Company – Brenda Walton designer paper
Ink: Memento – Tuxedo Black
Accessories: pearls, Diamond Glaze, Art Glitter adhesive, glitter, Prismacolor pencils, baby oil, Aleene's tacky glue
Tools: paper stumps, corsage pin, EK Success border punch, Nestabilities
Techniques: Prismacolor, glittering, dry embossing

Monday, November 15, 2010

HAPPY MONDAY!!

Well hello there Sweet 'N Sassy friends!! Happy Monday to you!! I am SO excited to be here sharing with you today!! This is Jacquie or Javablustamper, as some of you may know me! I have a SUPER cute digi to share with you!! I was in a KRAFT kind of mood last night and thought of SWEET Fenton The Frog! I just LOVE this combo! I used my Copics to color him in and I cut him out with my Nesties. I used Kraft and Dark Chocolate cardstock, along with Peeled Paint Distress ink. Then I finished my creation with some misc ribbon I had on my desk! I really LOVE that this could be used for a guy or a girl!! Hope you like! Thanks SO much for stopping by and letting me share with you! Hope you have a WONDERFUL day!! AND.....as I ALWAYS say...............ENJOY LIFE!!

STAMPS: Fenton The Frog SNSS
PAPER: Kraft, Dark Chocolate, White
INK : Peeled Paint Distress Ink
COPICS:0,YG95,G99,E43,E47,W1,W3

Sunday, November 14, 2010

Customer spotlight Sunday


We are featuring a beautiful sunset card today for our Sunday customer spotlight. This gorgeous creation is brought to us today by Lisa. This lovely scene was created using distress inks and one of the images from one of my favorite Sweet N Sassy stamp sets called Serene Silhouettes. I love how the scene stands out against the white background and the black ribbon and pearls are perfect accents. Thank you so much Lisa for sharing your wonderful card with us!

Thank you for visiting today and have a blessed day!

Saturday, November 13, 2010

November Chrysanthemum

Happy Saturday everyone....Julie here from
I don't know about all of you, but I'm so glad for the weekend!
It's definitely been an exhausting week!

My card for today is a CAS card!
I love CAS, and this stamp is perfect for that!


Card details:
Paper: Kraft, Cherry Cobbler, White
Ink: Versafine black
Misc: paper piercer, dimensionals

Thanks so much for stopping by today!!!

Friday, November 12, 2010

Winter Silhouette Scene


Hello! Hope you have had a good week:) My card today is pretty simple, but I love making scenes and the Silhouette Snowflakes and Forest Silhouettes stamp sets work gorgeously together! I thought I'd make a more winter themed birthday card as there are many people that have birthdays when it's cold;) For my trees I stamped them with full ink first and then second generation stamped them to create some depth. For my snowflakes I outlined them with a glitter gelly roll pen and to create the feeling of snow drifts I added some random stitching to the bottom. I hope you are staying warm! Hugs....

Thursday, November 11, 2010

November Chrysanthemum

Hello everyone!  This is my first post as a Sweet n Sassy Design Diva.  I am absolutely thrilled to be here and feel that I have been given a gift.  So I hope that I express my gratitude by doing Korin and the rest of the team proud with the designs I share with you.

This month's release is absolutely fantastic and today I share a card with you using the November Chrysanthemum stamp set.  I have really loved the monthly flower sets that have been released these past several months and this one is no exception.  Although a bit tricky (for me) to color to do it justice, the image is fantastic.


I was inspired by the sketch from Sketch and Stash and also added a technique that I'm not quite sure what its called, perhaps double embossing.  The white background is embossed with both Birds & Swirls and Swiss Dots embossing folders - I really love this look.  I went with stronger violet tones on the flowers, but really this flower can be colored in many different hues as the real flowers come in so many hues, but I wanted a stronger color to stand up against the paler background and base.

I hope that you enjoy my card.  I wish you a very Happy Thursday!

Many hugs & blessings,
Melissa

Wednesday, November 10, 2010

Christmas Itty Bitties

Happy day after the blog hop day! Did you all enjoy the hop? There was so much beautiful artwork is see and what a great display of the wonderful Sweet 'n Sassy images! (Truth be told...I'm still working my way through that impressive list of participants!)

Today I'm sharing a darling new Christmas stamp set called Christmas Itty Bitties. It's so cute!! The set includes six of these darling 'itty bitty' images for only $9.00...now that's a holiday bargain!

I decided to keep it simple with today's card and only utilized white cardstock (one piece being embossed with the swiss dot embossing folder) and a tiny bit of green layered behind the images. I even kept my coloring simple, going with just red, green, and white. I'm lovin' the simple approach to card making these days! How about you?

Hope you all enjoyed yesterday's hop and today's card! Have a great week!!

Tuesday, November 9, 2010

Happy Birthday Sweet 'n Sassy Stamps!


It's hard to believe that 3 years ago today Sweet 'n Sassy Stamps "opened for business" with just 4 clear stamp sets being sold on a simple blog. Since then SNSS has grown to over 100 clear stamp sets and hundreds of digital stamps! God has been so good to us!

Our images, sentiments and scripture stamps are sweet 'n sassy and everything in between. We're sure you'll find something you love.

We thought a fun way to celebrate this special day would be a HUGE blog hop....in fact we have invited not our own DT but our DT "alumni" and friends to join us in celebrating with us today :).

They have created some wonderful eye candy for you so grab a nice, hot cup of coffee or your preferred comfort beverage and sit back and enjoy the hop :)!


This is your first stop on a hop of over 30 spectacular blogs :).

Here is the full blog route list. Please refer to it as the master list in the case of broken links or missing posts.


Janette
Lorie
Kim
Janice
Stephanie
Leah
Deb V.
Chupa
Nancy
Claudia
Amber
Kelly
Jeanette
Melissa
Lisa H.
Melanie
Joni
Julie
Ceal
Micki
Chrissy
Debbie S.
Monika
Tricia
Tami
Denise
Jacquie
Roxie
Lynne
Christi
Deb F.
Korin

Be sure not to miss a single blog because every single one of these ladies has a prize to give away :)!

We hope you enjoy hopping along today to see all the fun things we've created for your viewing pleasure. May you be inspired to create something truly amazing......something from your heart!

Sunday, November 7, 2010

Poinsettia tags...

Good Morning! It's Monika, back again, but this time as one of the Divas and not just a guest! I am so excited to be here again, working with Sweet n' Sassy Stamps.
I decided to make couple of tags, since they are so in these days. Everywhere I look, I see them popping up. I used December Poinsettia clear stamp set to make my tags (the flower is also available in digi format).

The base tags were die cut with a Sizzix die that I got from my local craft store. The images were colored with Copic Markers. As you can see, I only used a partial image, picked one flower that fit nicely on the circle piece.


On my first tag, I also used Spellbinders Lacey Circle and Circle dies and a Martha Stewart border punch... to embellish my tag, I used rhinestones, ribbon, and the oh so popular Baker's Twine... and to add 'texture' to the tag, I did some paper-piercing and die cut the lacey circle out of felt...
My second tag was made using scrap pieces. It was really fast and easy to put this one together. Again, I just used a partial image, cut it out and colored it with markers... and combined it with fern leaves. The base of the tag was dry embossed to add some texture.
Hope you get on the tag wagon and make some.

Thanks for stopping by!
Monika
Don't forget to come back tomorrow to celebrate SNSS 3rd birthday with us! You won't want to miss the fabulous blog hops and great prizes!

Customer Spotlight Sunday

Welcome to another fabulous customer spotlight. This week it is our darling Cocoa who is featured in our spotlight. These cards are brought to us by a very sweet and talented lady, Denise Marzec. Take a look and I am sure you will agree that these cards are amazing!


On this first card Denise used our So Sweet Cocoa set. This image is also available as a digi called Cookies for Cocoa. I love the use of pearls on the chips and stickles on the cookies.


This beautiful second card features our Autumn Lovin Cocoa set. I love the papers she chose and the stitching is so fun. The coloring is just outstanding as well! This adorable image is also available as a digi called Apple for Cocoa.

Thank you so much Denise for letting us share your beautiful cards today!

Saturday, November 6, 2010

Hello Friends!!!

Wow, how cool that I'm a guest designer for Sweet 'n Sassy!!!
I'm so excited....as I just love their stamps!

I used one of the new sets - November Chrysanthemum for my card today!
This was so much fun to color with my copics!!

Find me over at Paper and Such

Card details:
Stamps: Sweet n Sassy Chrysanthemum
Paper: Pure Poppy, SU dp, kraft, white
Ink: Memento black, Ranger antique linen
Misc: nesties, distresser, button, twine, copics, impression dies from PTI

ALSO....JUST A LITTLE REMINDER:


The Birthday Blog Hop will be in full swing on Tuesday!
There are prizes galore!  So if you love prizes....
you will soooooooooooo wanna be here!
I'm talking lots of prizes, and over 30 awesomely
fantastic blogs to check out!!!

See ya there!


Friday, November 5, 2010

Primitive Christmas

Hi, it's Joni and I am so excited to be presenting my first post on Sweet 'n Sassy Digis! Today I used one of the new Christmas stamp sets called Primitive Christmas! I love this set. I paper pieced Santa's robe with Cottage Christmas from Imaginisce. I added Liquid Pearls to trim Santa's robe. Then I used an oval nestie, and scallop oval for my focal image. Black border is also cut with a nestie. White pearls embellish the black trim!

We are having a Birthday Blog Hop!

What would a birthday be without a blog hop full of prizes? The fun starts right here on Tuesday, November 9th, our official birthday :). Not only will our current DT be participating, but we've invited many of our alumni DT and friends to join, too, and each one is giving away either a FREE digi or stamp set on there blog THAT DAY ONLY. You really won't want to miss it!


Now what are you waiting for? Go mark your calendars and grab your new stamps :)!

Thursday, November 4, 2010

Season Of Love

Happy Thursday!
I just love this set Season Of Love, it makes the most beautiful Christmas cards. The sketch I used is this weeks sketch challenge at SplitCoast Stampers you can find it HERE  Sweet 'n Sassy has just released 6 new sets so you will want to make sure to check them out HERE.

Tuesday, November 2, 2010

Wait on the Lord

Hello. I'm excited to be making my first post as one of the new SNSS Design Divas.
I used the newly released Wait on the Lord set to make this vintage card. I love this set for making quick but elegant cards. Stamped the verse in distress vintage photo ink and cut it out using Spellbinders Labels One. Used a border punch to layer under the long strip and added a prima flower with a pearl attached. All design paper comes from the Paper Studio Mirabelle paper pack. I used Splitcoaststamper's Sketch #305 for my layout.


Supplies used:Stamps: Sweet n’ Sassy Stamps – Wait on the Lord
Paper: olive green, vanilla, The Paper Studio - Mirabelle
Ink: Distress Ink - Vintage Photo
Accessories: Prima flower, brad
Tools: Nestabilities, border punch

Have a great stamping day.
Amber

Cup of Mouse!

Hello everyone, I am a guest designer for the month of November and very proud to be here with all the wonderful designers at Sweet n' Sassy Stamps!  Today my card will show you images from the newly released set Cup of Cocoa, isn't this mouse cute!


-Prismacolor pencils, baby oil and paper stumps were used to color the image using the Gamsol technique. Baby oil replaces the Gamsol/mineral spirits.
-The snowflakes around the mouse and on the insert are cut from glitter paper using the Cuttlebug die set Winter and they are glued to the card with Aleene's tacky glue.
-Stickles was added to the snowflakes on the image.

I stamped a partial image for the envelope and used the same coloring techniques as the card.  The insert is simple with three snowflakes glued in place but a nice added treat to the recipient.

Supplies used:
Stamps: Sweet n’ Sassy Stamps – Cup of Cocoa
Paper: White, Bazzill – red, Encore Sales – green, K&Company – designer paper, DCWV - white glitter paper
Ink: Memento – Tuxedo Black
Accessories: Making Memories – brads, Stickles, Aleene’s tacky glue, Prismacolor pencils, baby oil, tape, ribbon
Tools: Cuttlebug and Winter die, Stampin Up mat pack and Bazzill piercer for brads, paper stumps, Nestabilities

I hope you have a great day and find some time for stamping!
Roxie

Monday, November 1, 2010

It's RELEASE DAY!

Good morning fellow stampers!

Today is release day!! We are so excited to share our newest stamp sets with you :)! But not only do we have new stamps to share, we have some exciting announcements, too!

SNSS is turning 3!!!
It's hard to believe 3 years have already passed since we "opened for business". What a fantastic journey it's been!

Not only are we celebrating with a fabulous blog hop and prizes (which I will get to later) BUT, we've got something else in store for you, too....

We hear from so many of our customers how much they love Cocoa Mouse, so we decided it would be fun to add him to the birthday celebration. We've designed this brand new set, which has been released today with 7 other sets, but this set will be offered a bit differently from the rest.....

Isn't he sweet? And just in time for your Christmas cards!

Since we are turning 3, we are GIVING this set away FREE when you purchase any 3 stamp sets in a single order
during the month of November. You MUST add the set to your cart and enter coupon code COCOA during checkout to receive the FREE discount.

But that's not the only way to can get this adorable set.....if you just want to buy the set alone, you'll save $3 off the regular price of $9, making it only $6! How fantastic is that?!

Now how about the rest of the new release???


Want the whole release??? Get all 8 sets ($82 value) for just $68! That includes your FREE Cocoa set for buying 3 sets :)!


Birthday Blog Hop!
What would a birthday be without a blog hop full of prizes? The fun starts right here on Tuesday, November 9th, our official birthday :). Not only will our current DT be participating, but we've invited many of our alumni DT and friends to join, too, and each one is giving away either a FREE digi or stamp set on there blog THAT DAY ONLY. You really won't want to miss it!

Now what are you waiting for? Go mark your calendars and grab your new stamps :)!